HubSpot + Drop Cowboy
Ringless voicemail and SMS marketing integration for HubSpot CRM

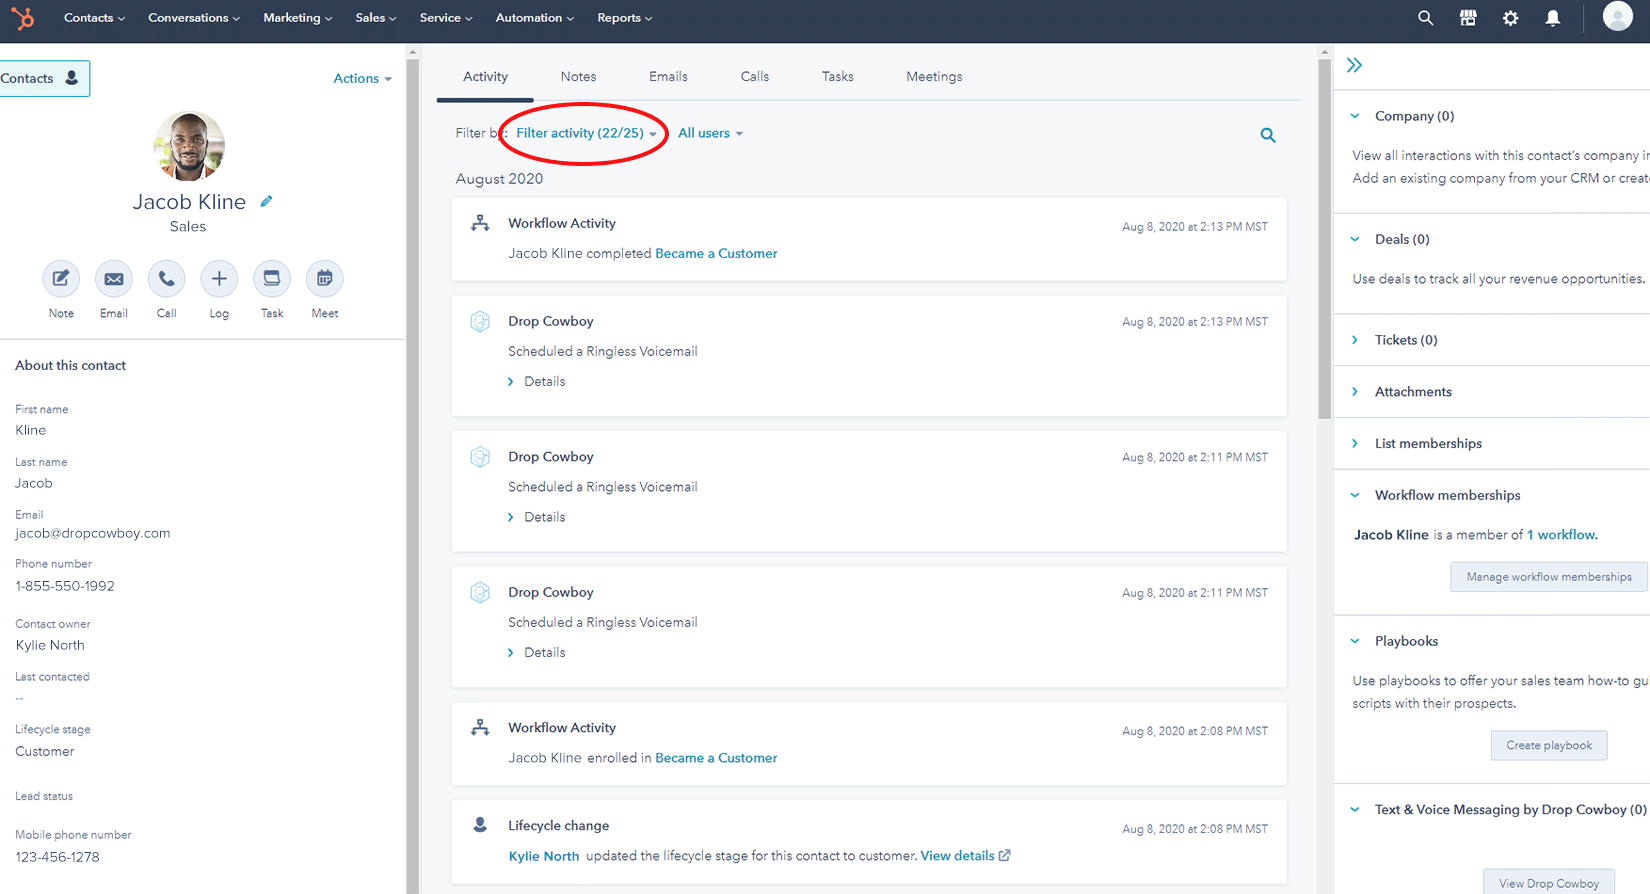
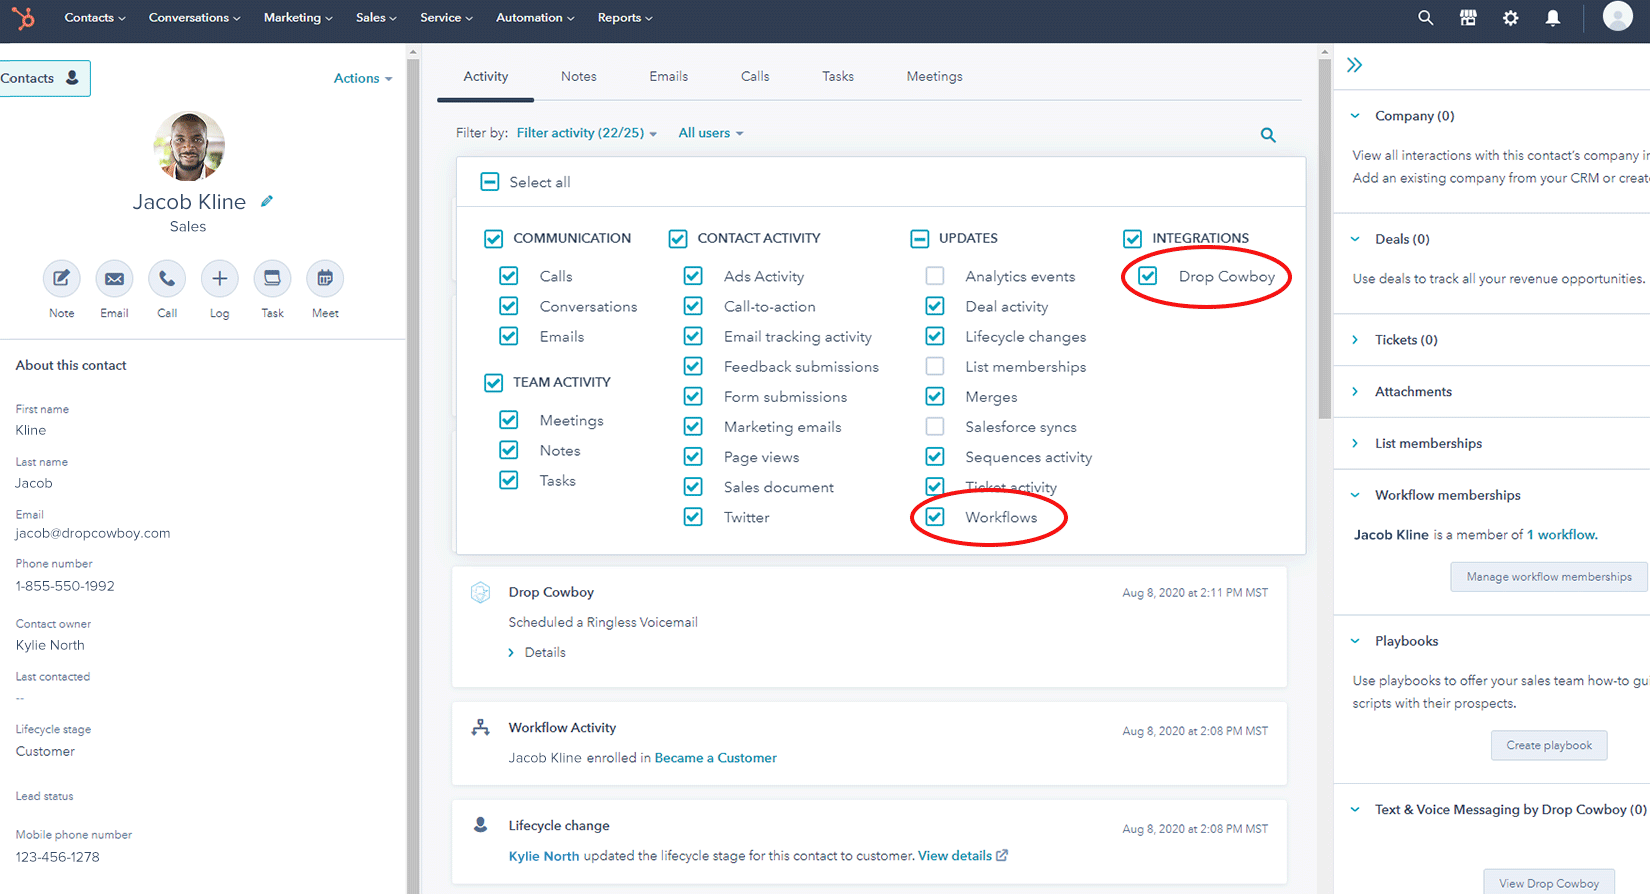
Drop Cowboy integrates with HubSpot CRM to let you send ringless voicemail and SMS messages based on contact activity, deal changes, and workflow triggers. Reach your leads with personalized voice messages that appear directly in their voicemail.
Get Drop Cowboy for HubSpot
Drop Cowboy is available in the HubSpot Ecosystem Marketplace. Install the integration directly from HubSpot.
View in HubSpot MarketplaceHow to Connect HubSpot with Drop Cowboy
Drop Cowboy integrates with HubSpot through Zapier, which allows you to trigger ringless voicemail and SMS messages from HubSpot contact and deal events.
Sign Up for Drop Cowboy
Create a Drop Cowboy account if you haven't already. You'll need an active account with at least one recorded voicemail message.
Connect via Zapier
Visit Drop Cowboy on Zapier and create a new Zap with HubSpot as the trigger and Drop Cowboy as the action.
Create a HubSpot Trigger
Choose your HubSpot trigger event. Popular options include:
- New Contact Created
- Contact Property Changed
- New Deal Created
- Deal Stage Changed
- Form Submission
Record Your Voicemail
In your Drop Cowboy account, record the voicemail message you want to send. Label it clearly so you can select it in Zapier.
Test and Activate
Test your Zap to ensure everything is connected properly, then turn it on. New HubSpot events will automatically trigger your ringless voicemail or SMS messages.
HubSpot + Drop Cowboy Use Cases
New Lead Welcome
Trigger: New contact created in HubSpot
Action: Send a personalized welcome voicemail introducing your business and inviting them to call back
Deal Stage Follow-Up
Trigger: Deal moves to a new stage
Action: Send a follow-up voicemail relevant to that deal stage (demo scheduled, proposal sent, etc.)
Form Submission Response
Trigger: Contact submits a form on your website
Action: Send an immediate voicemail thanking them and letting them know you'll be in touch
Re-Engagement Campaign
Trigger: Contact property changes (e.g., marked as cold lead)
Action: Send a re-engagement voicemail to reconnect with dormant leads
Why Use HubSpot with Drop Cowboy?
HubSpot CRM provides powerful contact management, deal tracking, and marketing automation. Adding Drop Cowboy's ringless voicemail and SMS capabilities gives you additional channels to reach your contacts in a personal, non-intrusive way.
Faster Response Times
Automate voicemail delivery when new leads enter HubSpot. Reach prospects within minutes instead of hours.
Personal Touch at Scale
Send personalized voice messages to hundreds of contacts without manually calling each one.
Higher Engagement
Voicemail messages often see higher engagement than email. Stand out from competitors using only email outreach.
Seamless Automation
Once set up, your HubSpot workflows automatically trigger voicemail delivery. No manual intervention needed.
Compliance Reminder
When automating ringless voicemail and SMS from HubSpot, ensure you have proper consent from contacts and honor all opt-out requests. Drop Cowboy provides tools to help manage compliance, but it's your responsibility to follow TCPA, TSR, and other applicable regulations. See our Compliance Guide for more information.
Ready to connect HubSpot with Drop Cowboy?
Start sending automated ringless voicemail campaigns from your HubSpot CRM today.
HubSpot Integration FAQs
Common questions about connecting Drop Cowboy with HubSpot